
Panasonic CF-R3 HDD replacement
Alright. I got a Panasonic CF-R3, yea, pretty old model by now (a few years old actually, but still rockin’). Someday, you’ll decide like me to change the hard drive (for a 5400 rpm that is more silent and also consume less power, for example! :D actually, make sure it does consume less power or your battery life will be significantly shorter)
The R4, R5, R6 (and maybe future R-models) are all built with the same laptop case, thus, can be unmounted the same way.
Here’s the little walk through.. (click on the images for bigger versions)
Turn back your computer, remove the battery
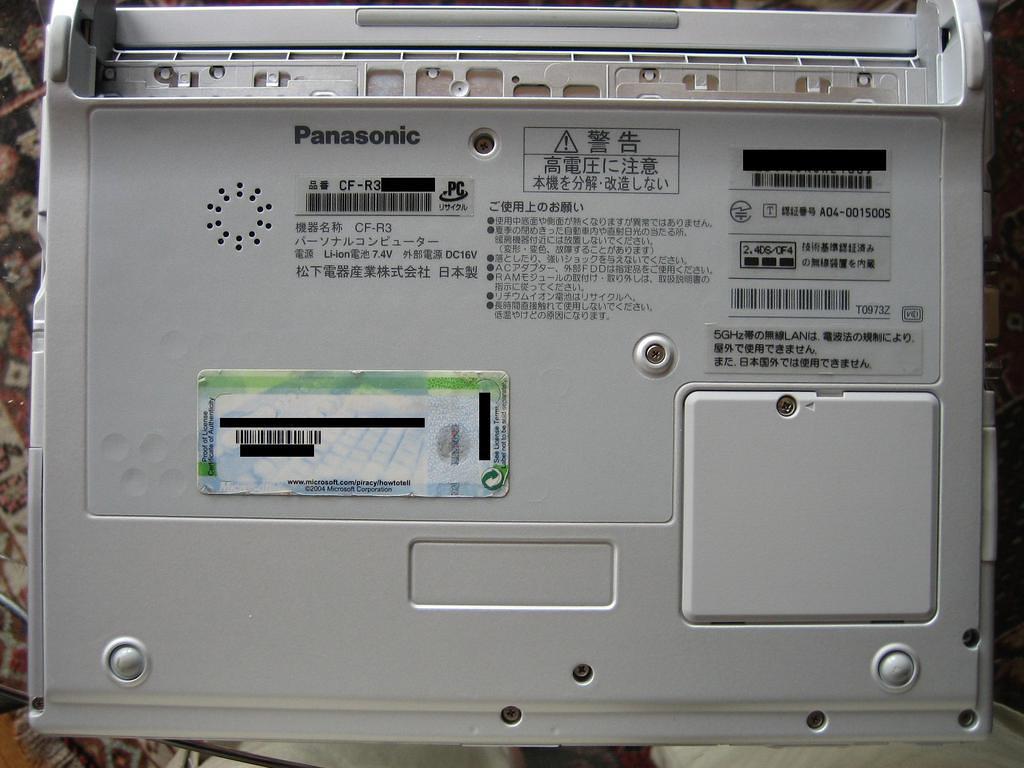
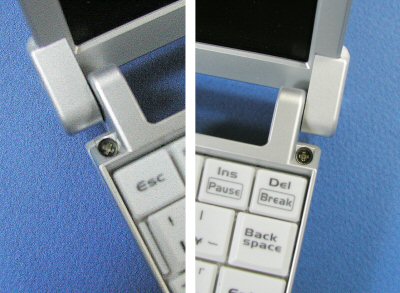
Remove the keyboard latches, as indicated. There is one on each sides of the battery compartment. Just slide them up and keep ‘em safe. Also unscrew at least the 2 middle screw in the back of the laptop, it holds the keyboard.

Now it’s time to turn back the laptop and remove the keyboard. Also unscrew the 2 top-side screws as show (there is some cover to remove above each screw). Be careful are there are short wires connecting the keyboard to the laptop. Unlock it and remove it. (the green wire, must be disconnected while removing the keyboard, take care not to break it)
Top-side screws:
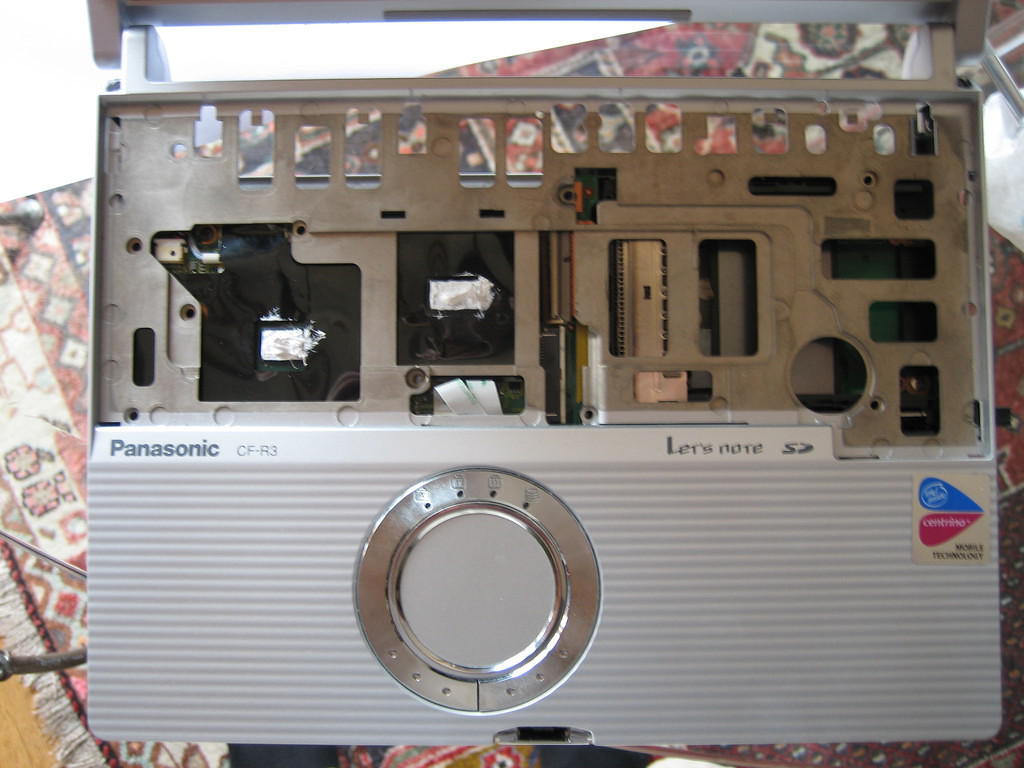
Here’s how it’s gonna look like:
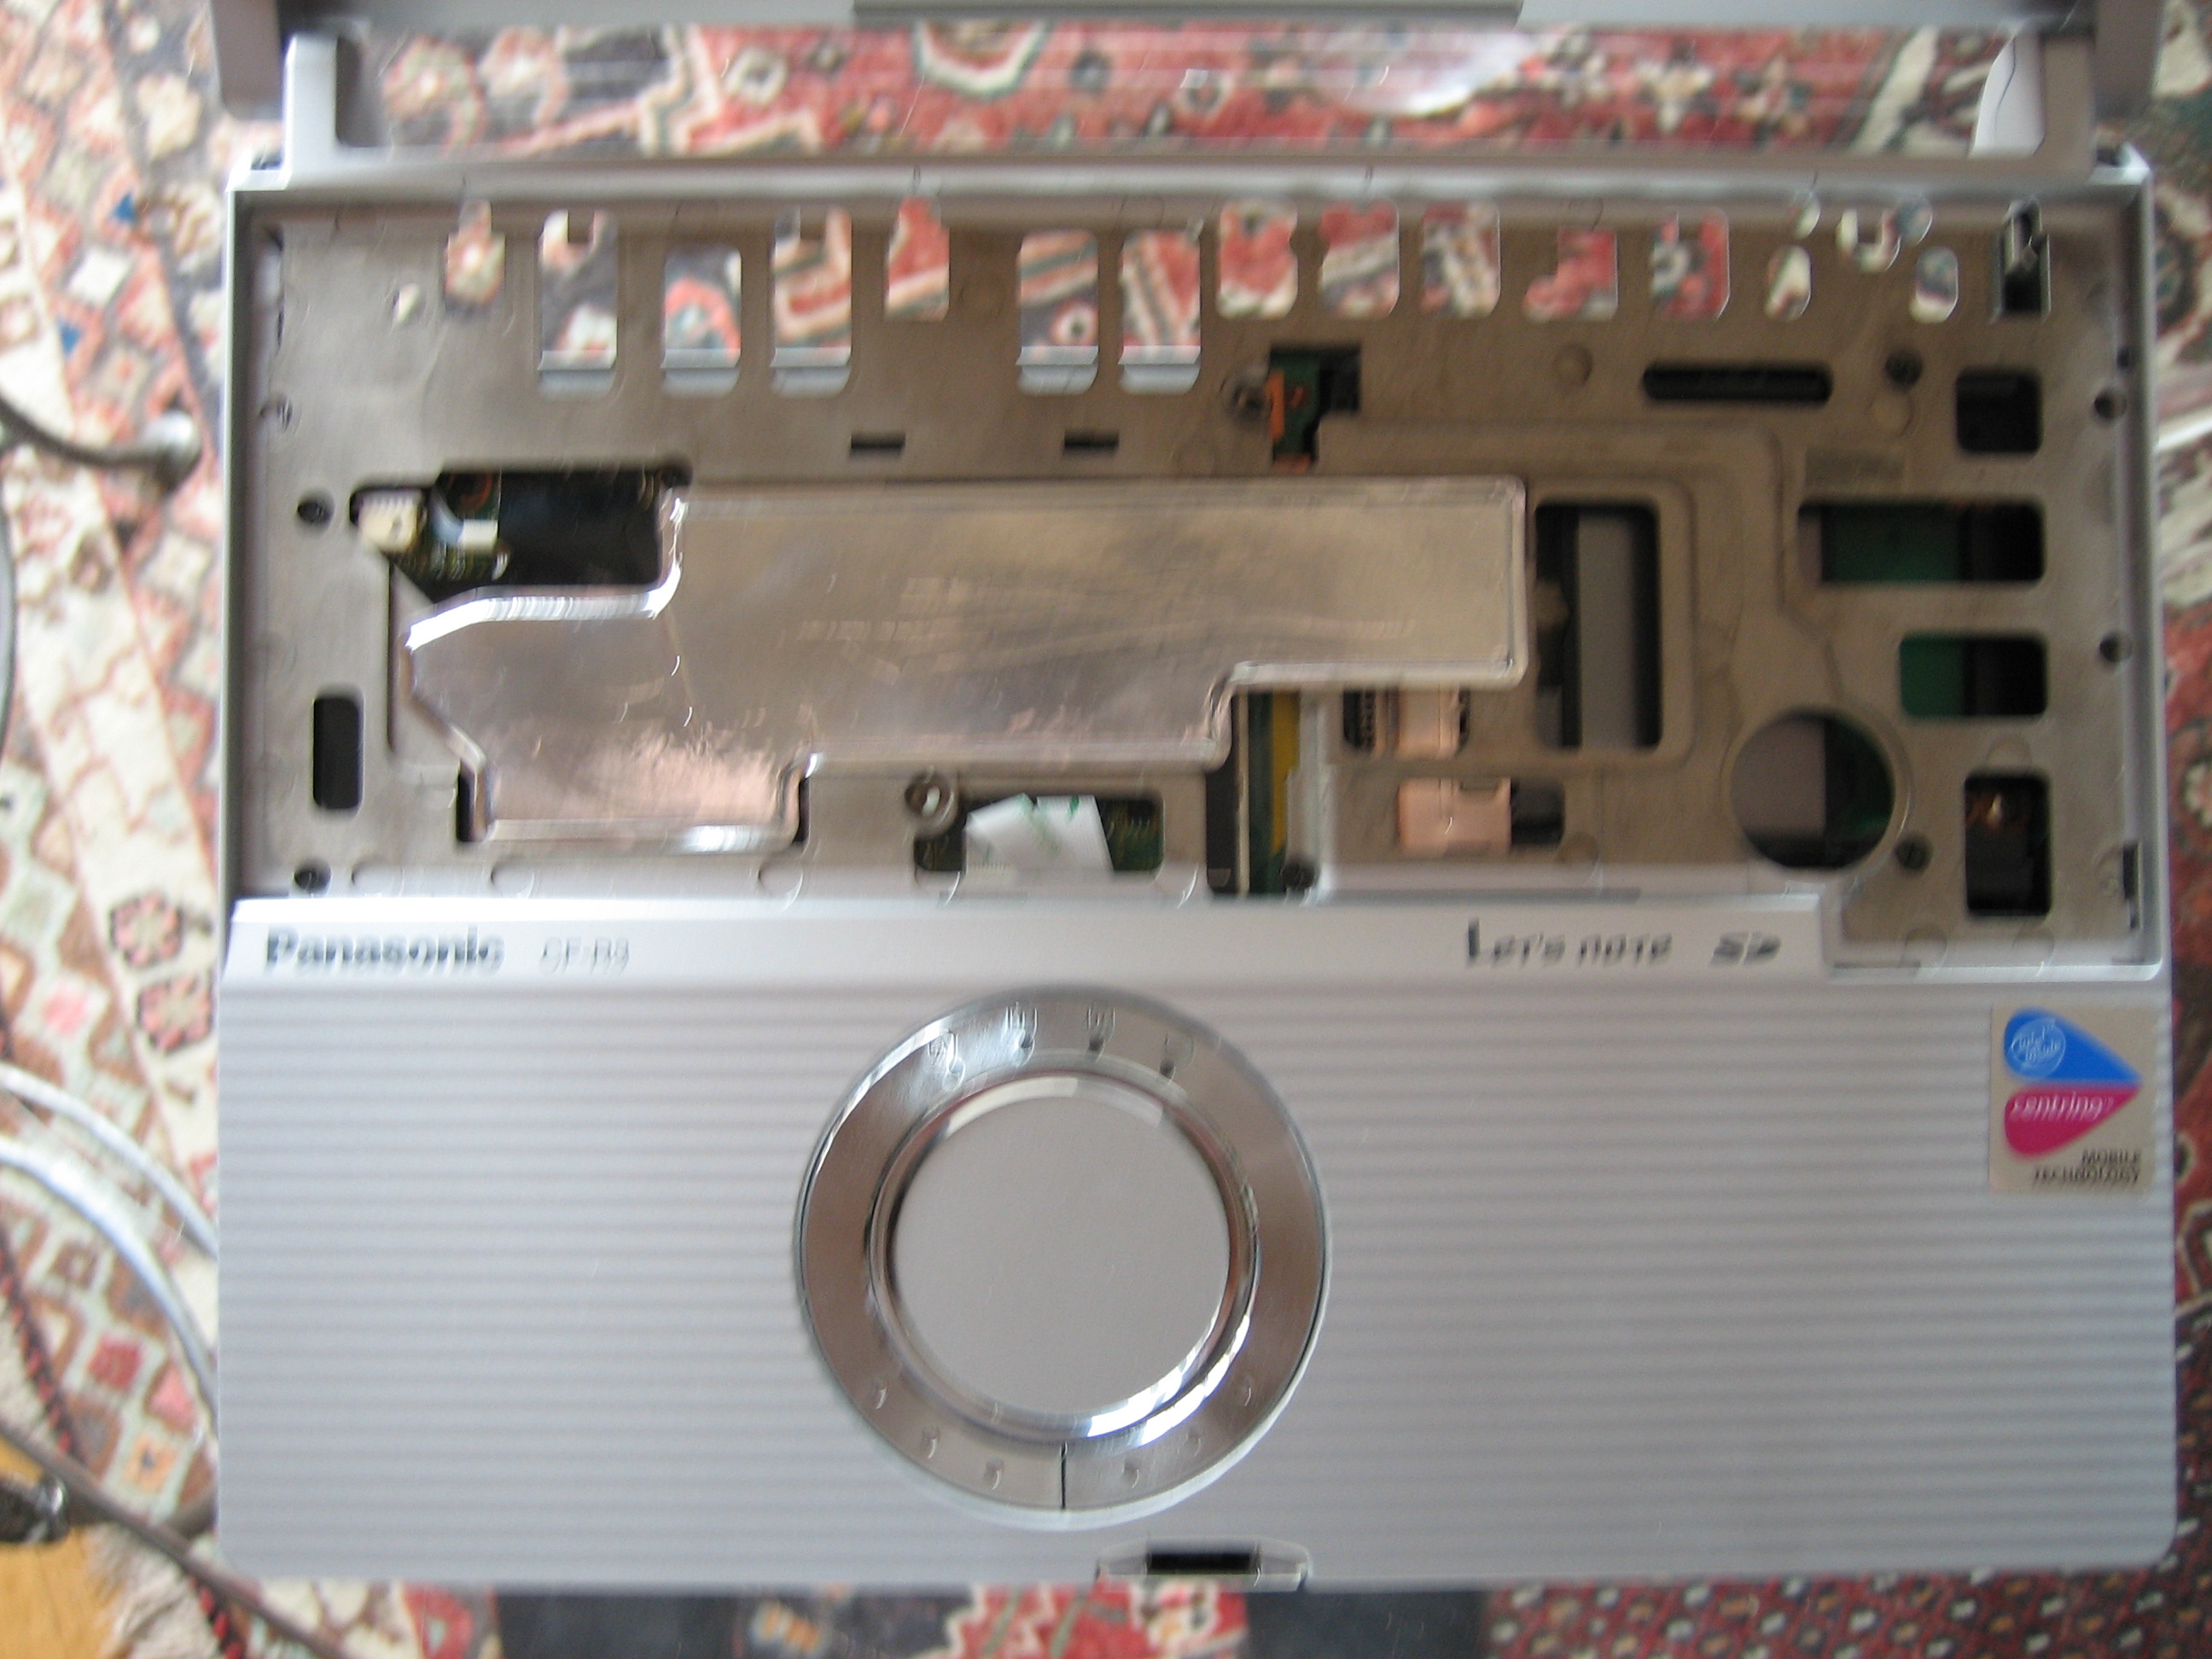
Notice this ugly heat sink (the glued shinning plastic-metal thing…). Just pull it off gently.
Alright, we can now see the CPU and friends. There are a few black screws to remove before you can lift up the whole top laptop cover. Note that you’ll also need some new thermal paste, the one provided sucks and will be destroyed when you remove the heat sink.
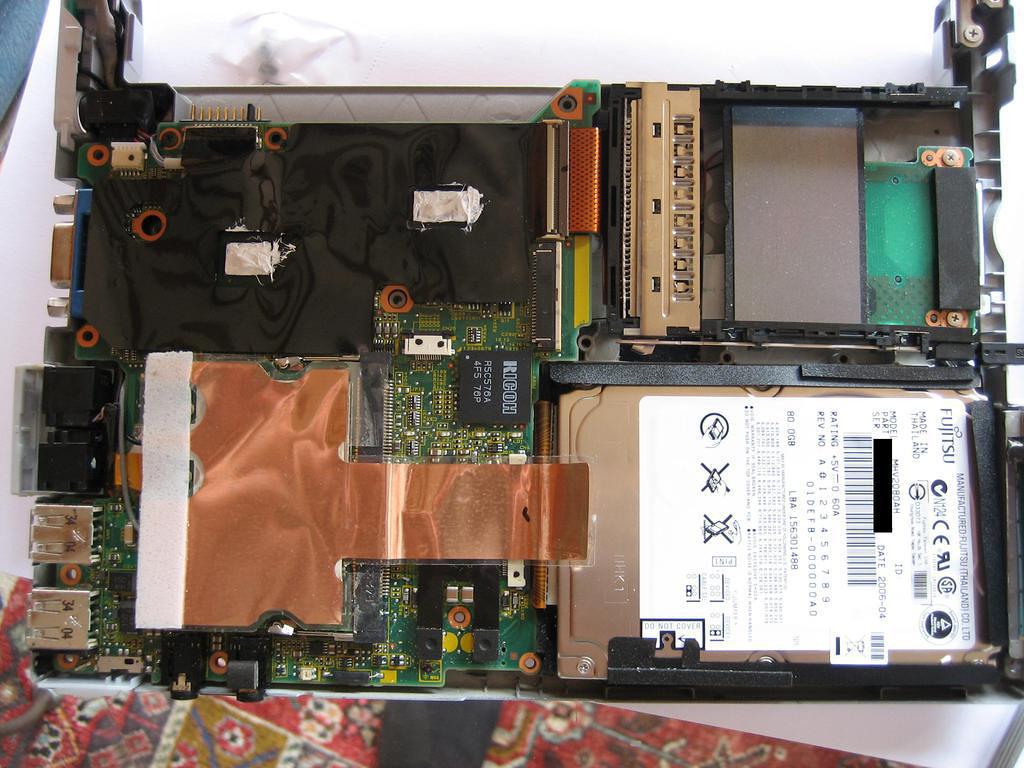
The large copper piece here covers the Intel’s wifi card.
You can now access the hard drive for replacement. Just unplug/unscrew the different parts and replace it :)
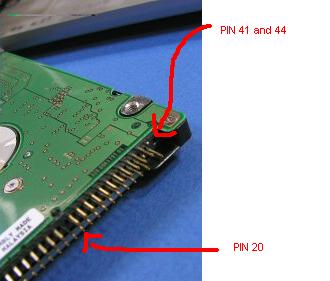
Be careful, you must use a 3.3 volts drive. It’s common to use a 5 volts drive and convert it to 3.3 by cutting a pin out. I did that. Usually, You have to remove the pin 44 and sometimes 41 Count the number of pins while the drive is facing the electronic board to you, skipping the first block of four (it is spaced out from the other pins). Pin 20 is also cutted off (and should already be missing on the 5v drive, so you don’t need to cut it yourself.) Simply put, count them like this:
2.4 2.4.6.8....42.44

1.3 1.3.5.7.....41.43
Compare with the laptop’s 3.3v drive pin scheme to make sure you’re gonna cut similar ones (= right ones. Don’t ruin your drive, triple check it!!) You may also want to check the vendor’s pin schematics (check on the vendor website for full specs) and look for the 5 volt pin to ease your mind :)
Note: The new disk is a Seagate Momentus 5400.3 ST980815A.
Comments