
DC-3 / C-47 Build log
Once upon a time, I decided to try to build my own plane from scratch. That is, from nearly complete scratch, you know. Just deciding on one and making it without externals plans and so on.
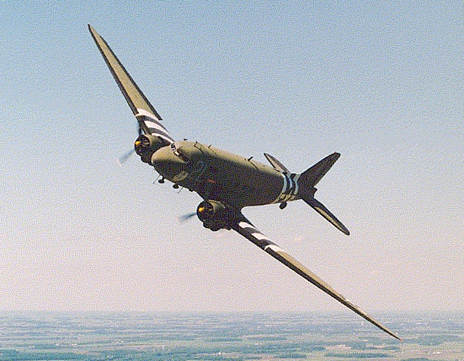
I quite like the DC-3 look. It has been converted as a military plane called the C-47 Skytrain (they share the same airframe).
Quick overview of the research and build planning
The wing shape is hard to mistake for another plane, as well as the pronounced wing angle or the large rudder control surface.
The engine’s propellers are also strangely extremely close to the fuselage.
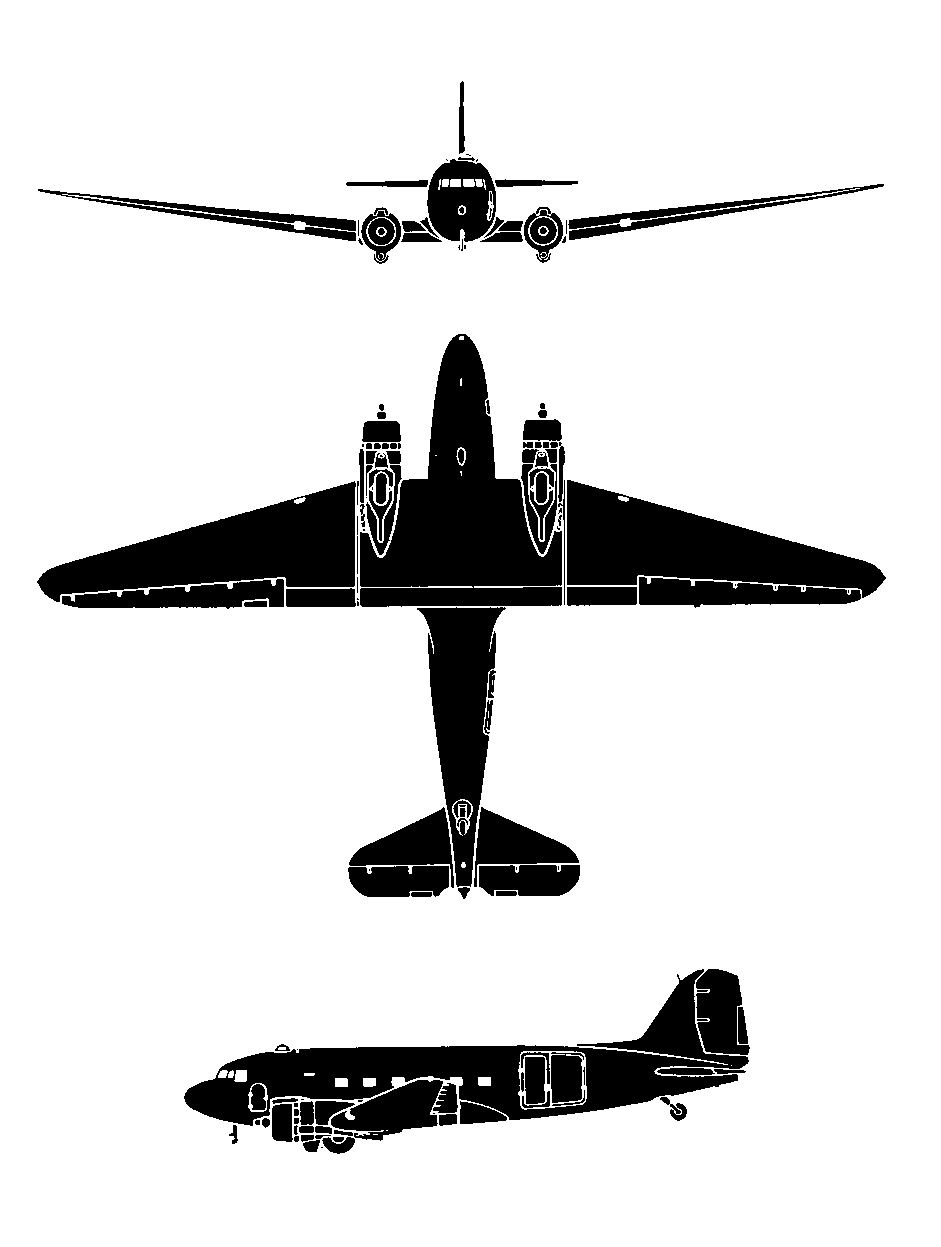
I have found the original plane’s dimensions and characteristics on wikipedia:
- 19.7 meters long.
- 29 meters wingspan.
- 5.16 meters high.
- 8.3 tons empty, 11.4 tons maximum load.
- 3 bladed Hamilton Standard 23E50 propellers.
I also found out various things while researching the plane’s characteristics, like this funny story. This is a guy who’s been trying to take off with a DC-3 and a glider attached, but could not. That is because the DC-3?s wings have a negative angle of attack, which are sticking it to the ground until you pull. This is done to allow taxiing with the rudder, as wheels were not linked to the sterring system.
For my model, I decided to use a slightly positive angle of attack, since I don’t care all that much for taxiing and it makes the flying easier (the plane stays straight without using the horizontal stabilizer too much).
I decided to use a complete foam construction, scaled at approx 1:50. The wings were made by a CNC system here http://www.fly-and-fun2002.de/ after I sent the precise mesurements of course. This ensure the wings are perfectly cut as its the most important part of the plane. The airfoil profile is NACA2412.
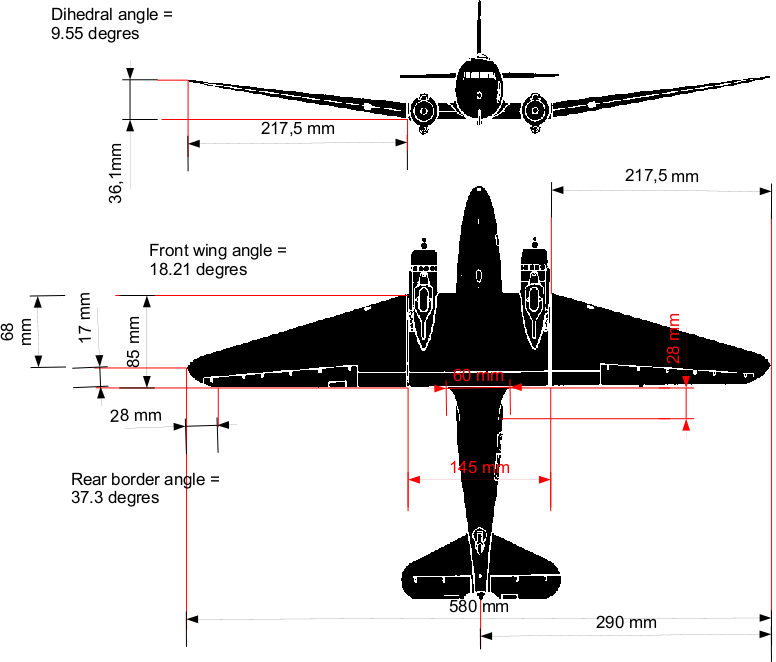
The drawing gives all the mesurements necessary. Other parts of the plane (fuselage, rudder, horizontal stabilizer, inlets and motors) where mesured in the same manner, and printed out.
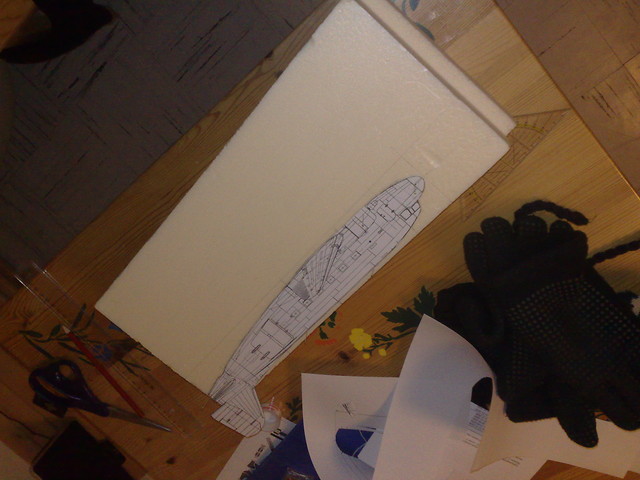
The fuselage is then cut from a block of styrofoam, as instructed by Thomas’s website. Everything was cut with a regular metal saw and sharp knife. I would recommand a “hotwire” however (basically, a wire that is hot enough to cut through the foam), as the other tools cannot make a perfect cut on large pieces. Everything is heavily sanded afterwards.
Most of the modelling is done by sanding and thus approximate.
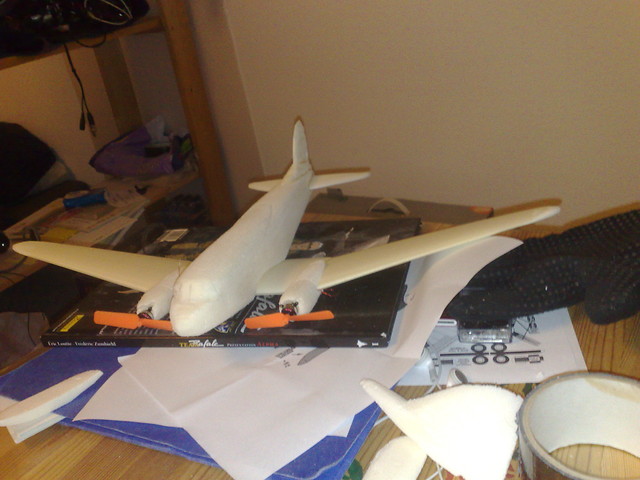
“Pictured building”
First we draw the printed version on a block of foam…
Then we cut a raw version of the fuselage… (note the very unperfect cut of the saw)
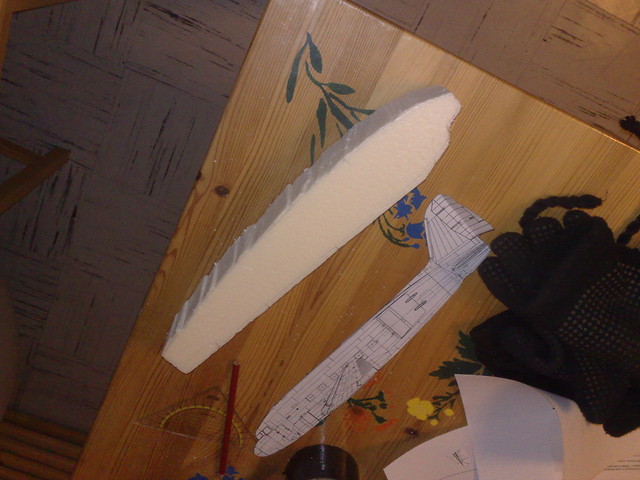
We cut all sides as well, it start to look like remotely like a fuselage… (note the multiple markers to help with the cut)
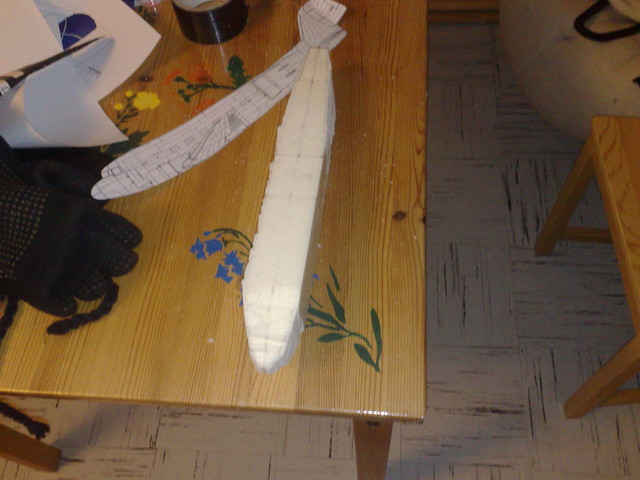
And we have something that look remotely like a plane (yeah sort of!). Note the paper version I made to give me an idea of the design of the plane when finished. Plans for the paper version are from fiddlers green.
At this point, I cut all angles at 30 degres with the saw, and start sanding heavily.
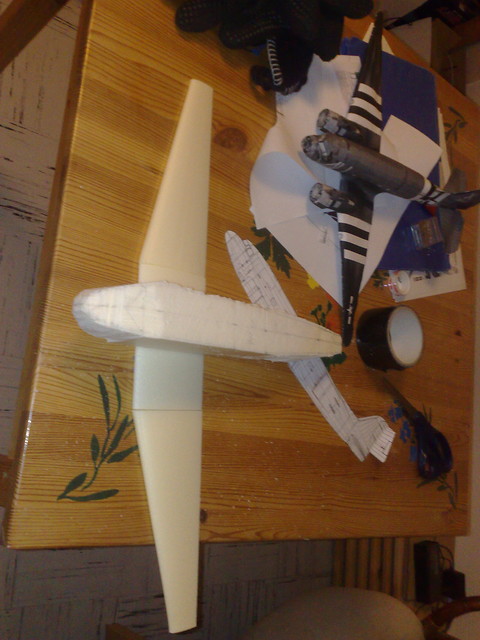
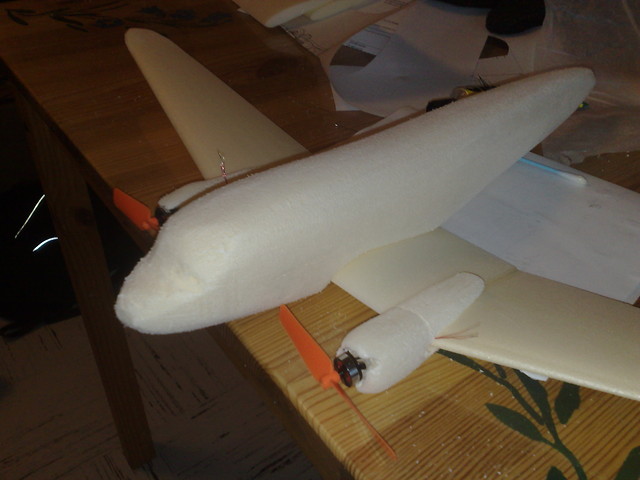
Wings parts glued together, engines dones, more sanding (it looks like a peeled potatoe at this point.)
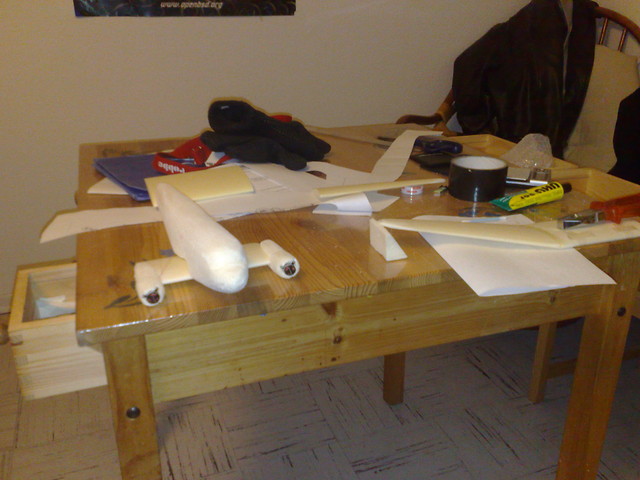
Note:: The propellers are 2 bladed, as 3 blades would draw too much current and fry the tiny speed controllers. Also, they’re mounted a bit further apart than the original due to this, else they would hit the fuselage. If i remade it, I would make the central wing larger (even if it wouldnt be scale size anymore). However it looks ok like this as well.
The small HobbyKing AP03 motors fit inside the foam and the wires are going through.
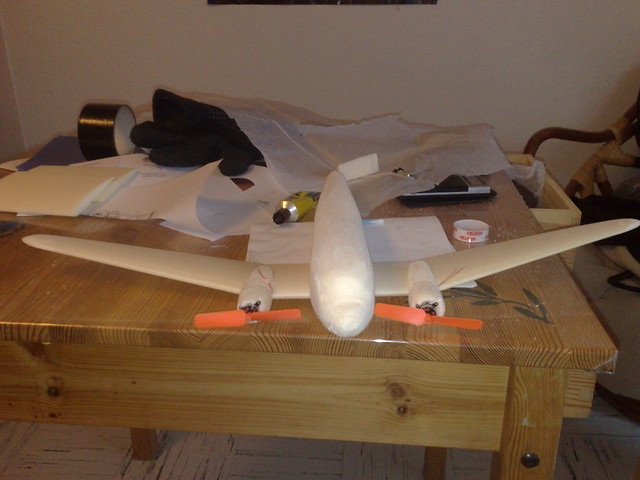
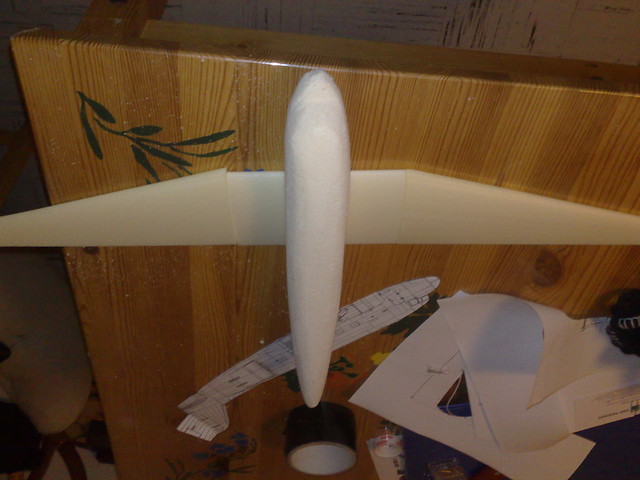
Even more sanding, it start to look like something! (motors are not yet glued in and “fall” out)
At this point, I’ve cut and sand stabilizer and rudder (the rudder is not that nice, maybe i’ll remake one). Then a large area of the cockpit is “chopped off” the plane to allow “digging” the foam (weight) and placing the electronics. There is an AR6400L and a 450mah 1S zippy battery in there currently. Digging was done by precutting sides with a sharp knife, and really actally dig with a screwdriver and various such tools, then heavily sanded. Once again a hotwire would have done this much quicker and nicer I guess. However the result here isn’t so bad. Note that I digged also the rear of the fuselage, behind the AR6400L receiver, mainly for weight issues.
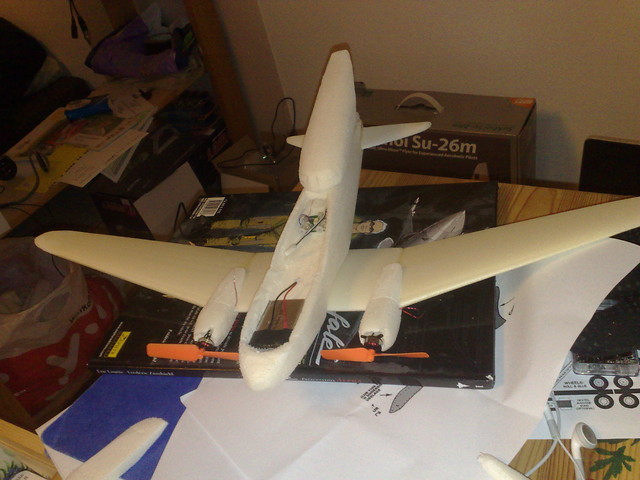
When the cockpit/canopy is closed, you can’t see the cut!(but you can see the ugly rudder :)
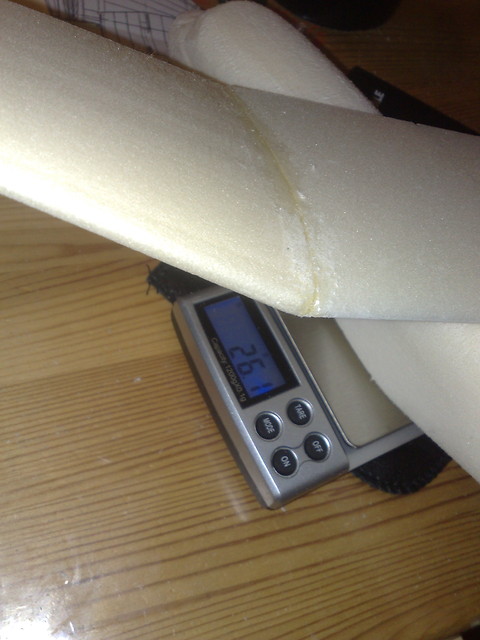
Current weight for the complete airframe is 26.1 grams. Not too bad I hope, but I guess it could have been better. Used lot of glue, and didn’t sand as hard as possible inside the fuselage by fear of fragilizing something.
Parts used (so far)
- Foam blocks (free / from Thomas).
- UHU Por glue (foam).
- UHU Hart glue (for plastics etc).
- Metal saw.
- Hobby/Sharp knife(s).
- Various screwdrivers (mind you, not for actual screwing).
- AP03 7500kv engine (x2).
- XP3A micro ESC (x2) (this stuff drives the motors).
- GWS 3020 propeller (x2).
- [AR6400L Spektrum receiver <http://www.horizonhobby.com/Products/Default.aspx?ProdID=SPMAR6400L) (2 servos on board for stab and rudder).
- SPMAS200L “Long Throw” micro servos (x2) (for ailerons).
- Ponal wood blue and japan paper (ultra light paper you can find when buying a shirt for example), for covering.
- Ultra thin electronic wire (0.1 mm) (for motors linkage).
- 1mm carbon fiber tubes (for stab and rudder linkage).
- Zippy 450mah 20 , Hyperion G3 240mah 25C 1S batteries.
- Mini JST-HX connectors (soldered manually to the batteries).
Thanks a lot to Thomas who helped me with absolutely everything. His website: http://www.fly2air.com (with a lot of nice planes!)
Comments