
Ultra micro video controlled heli (Blade mSR)
E-Flite’s Blade mSR is a micro helicopter, using high-end 2.4ghz Spektrum radios. It is a fixed pitch helicopter, mean there’s only one rotor and a real tail motor (like a real helicopter), and it does not allow for 3D maneuvers.
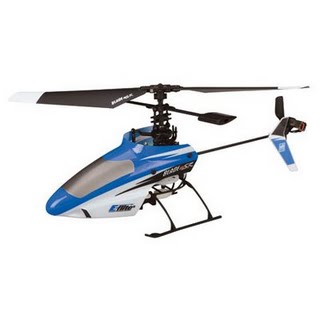
Unlike co-axials (2 motors and double blade main rotor), it is very precise. However, thanks to the integrated gyroscope and original head design (fly bar orientation) it is also very stable. Impressively stable for such a tiny helicopter in fact.
In short, a perfect platform for experimenting a micro remote video controlled heli :)
This heli can be remote controlled within approximately 300 to 800 meters, although the battery will probably empty before you reach that.. :P (technically, it could further, but in practice it depends a lot on your flying field)
Videos
Night
Day
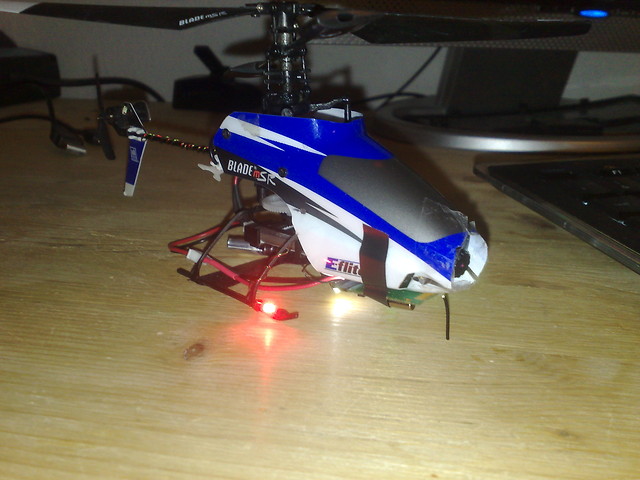
The helicopter
You can get the Blade mSR at most RC hobby shops for around 120 to 160 USD including battery and charger (including or not the RC transmitter, depending on the version: RTF has the transmitter, BNF does not).
Size: 19 cm long
Weight: 28 gr
Flight time: 8 min
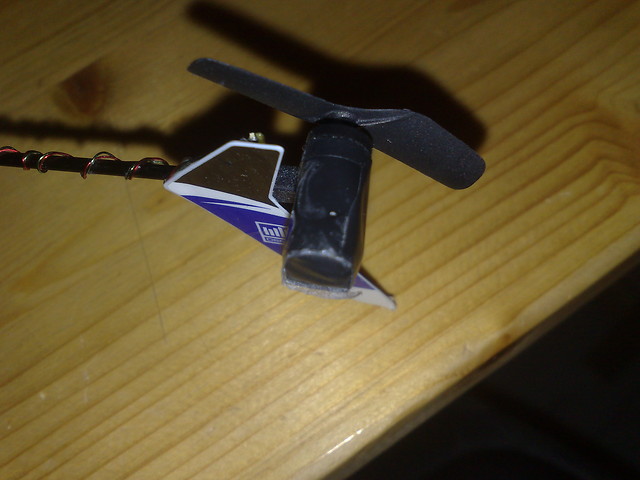
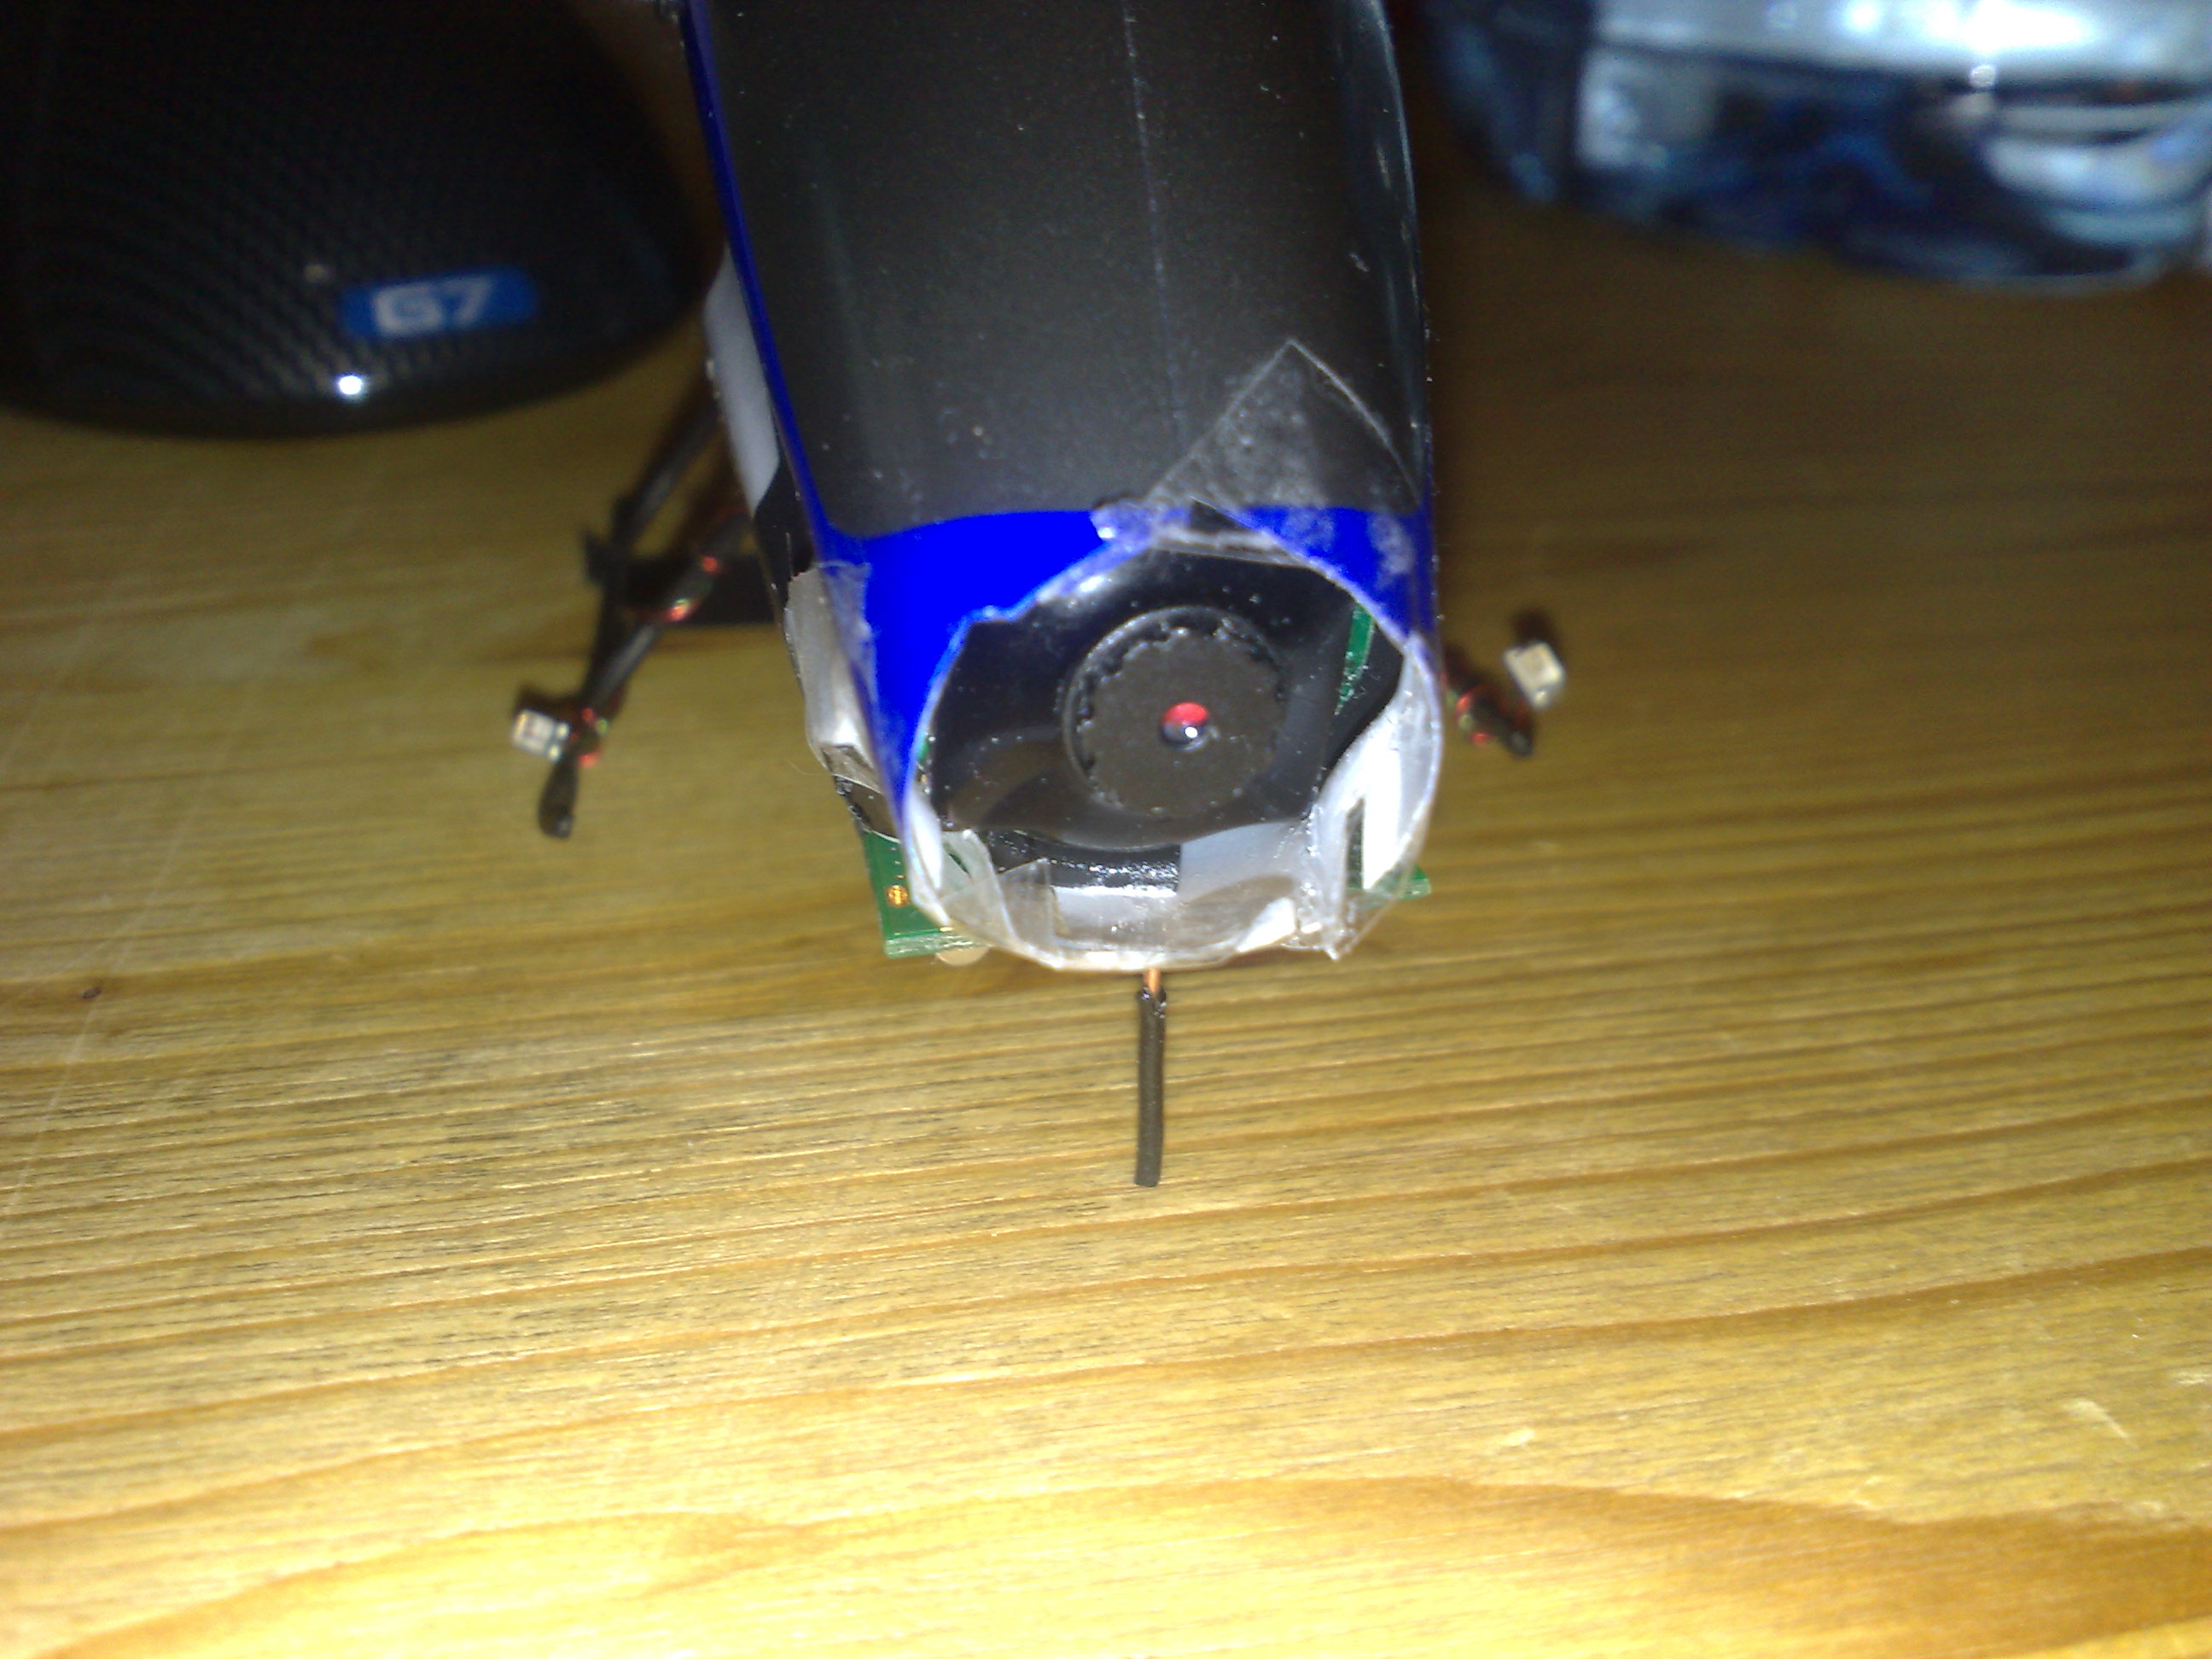
While it’s extremely crash resistant (go-straight-in-the-wall-at-max-speed-and-keep-flying kind of resistant), this helicopter has one design issue. The rear motor cap is popping off easily after a few crashes, even very light ones. Due to the small size, you will eventually crash.
This is easily solved by tapping the rear of the motor cap, I recommend elastic electric tape (black if possible, so its invisible). Stretch it and secure the rear of the tail rotor. Note that some push the propeller fully into the motor axis to protect it. In my experience the tape has been more reliable.
Fly it until you get conformable with it, and you can hover without too much movement.
It is best (but not required), if the heli also stays stationary when changing heading (turning on itself). This will not work by default. You need an advanced RC transmitter, and change the mixing between the rudder (tail rotor) and ailerons/stab (main rotor). This can be done with a Spektrum DX7, DX6i, DX8 or DX10T, or JR x9303/9305, 11x, 12x for example.
The RTF transmitter will not allow this. The more stable the heli is, the easier video piloting will be.
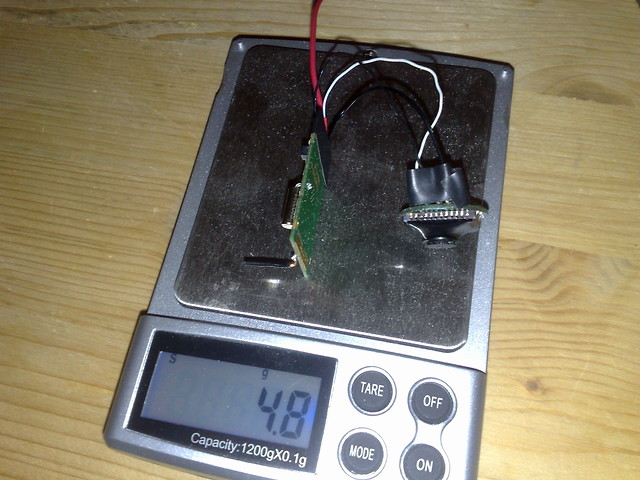
The (video) equipment
The video equipment I use weights a grand 4.9 gr. Following this is a list of what you need to get (note that you can of course use different components, but this is what I used.
To this day it is unlikely that you find anything better or much cheaper) . Most of it will need to be imported (shipping adds a bit to the price) from whatever country they’re selling it.
I tried to link the products to the same companies to minimize shipping costs, however sometimes it is slightly cheaper to order elsewhere. In some other cases, there’s just no other company selling these!
- Flytron FC420 CMOS 420TVL camera (62.00 USD)
- Cheaper 480 TVL alternative (59.00 USD)
- Airwave 5.8Ghz 25mW compact video transmitter (20.49 USD)
- Airwave 5.8Ghz video receiver with patch antenna (79.95 USD)
- HobbyKing micro-JST HX plugs (1.99 USD) Get many of those, like 20, because they break easily.
- HobbyKing 50mah 20C zippy batteries (1.99 USD) Get a few of these, like 2 or 3 at least so you don’t have to wait too long between flights, and if you break one.. well at this price, just have some spare you know.
- Hyperion G3 CX 130mah 25C batteries (6.90 EUR) Likewise, get a few of those. Probably 4 at least.
- A 3S battery of 1000 mah (16.95 USD), or more for the video receiver, with e.g. a JST plug
- A 3S battery monitor (6.99USD) (to avoid depleting the receiver battery, it would destroy the battery)
- A JST to barrel plug (6.49 USD) (to connect the battery to the receiver)
- A charger for the 3s battery (There are so many, a good choice could be the Turnigy Accucel 6 from HobbyKing, but even a tiny $15 3S charger works)
Note: You can just use a wall plug of 9-12V for the receiver instead of the battery+monitor+JST/barrel stuff, but then it means you can’t use your things outside/on the go.
- An EasyCap USB capture stick (23.95 USD) (this is not required, it let you view/record the video on your PC if you do not have RCA/Composite input, or other viewing equipement (like a TV with these inputs!) )
Note: Approximate grand total: 220 USD excluding the heli (120-165 USD additional)
The costs might be lower if you already own some of the components. For me it’s just been the camera and airwave missing (so 82 USD). This sounds like much but it is actually cheap for this area of the RC hobby. Rc-tech.ch sells a similar setup with lower quality and range, for 400 USD for example.
Things to get from your local store (or that you might have already):
- Some soldering iron (small if possible), soldering tin (again, small, like 1mm diameter).
- Some electric tape, small electric wires (between 0.5 and 0.9mm diameter).
- Some shrink tubing (2mm diameter approx). You might also use electric tape instead. its lighter, too.
- Some single core wire, for the antenna, it needs to be rigid enough that it can hold straight in the air (see the RC receiver copper antenna in the mSR? something like that is good!).
- Scissors, squeezers, forceps etc.
- Multimeter (not required, but useful for checking everything is ok).
Assembly
This is quite easy, really. Be careful to discharge your static electricity (touch something grounded, like a metallic heating, or your PC case).
Be careful when soldering, clean up your iron (steel wool), tin it, tin the wires, and when you solder a wire to a board (wire and board must be “pre-tined”), always have some tin on the iron. A good soldering does not take more than 5 seconds, and prevents burning the board/wires/etc.
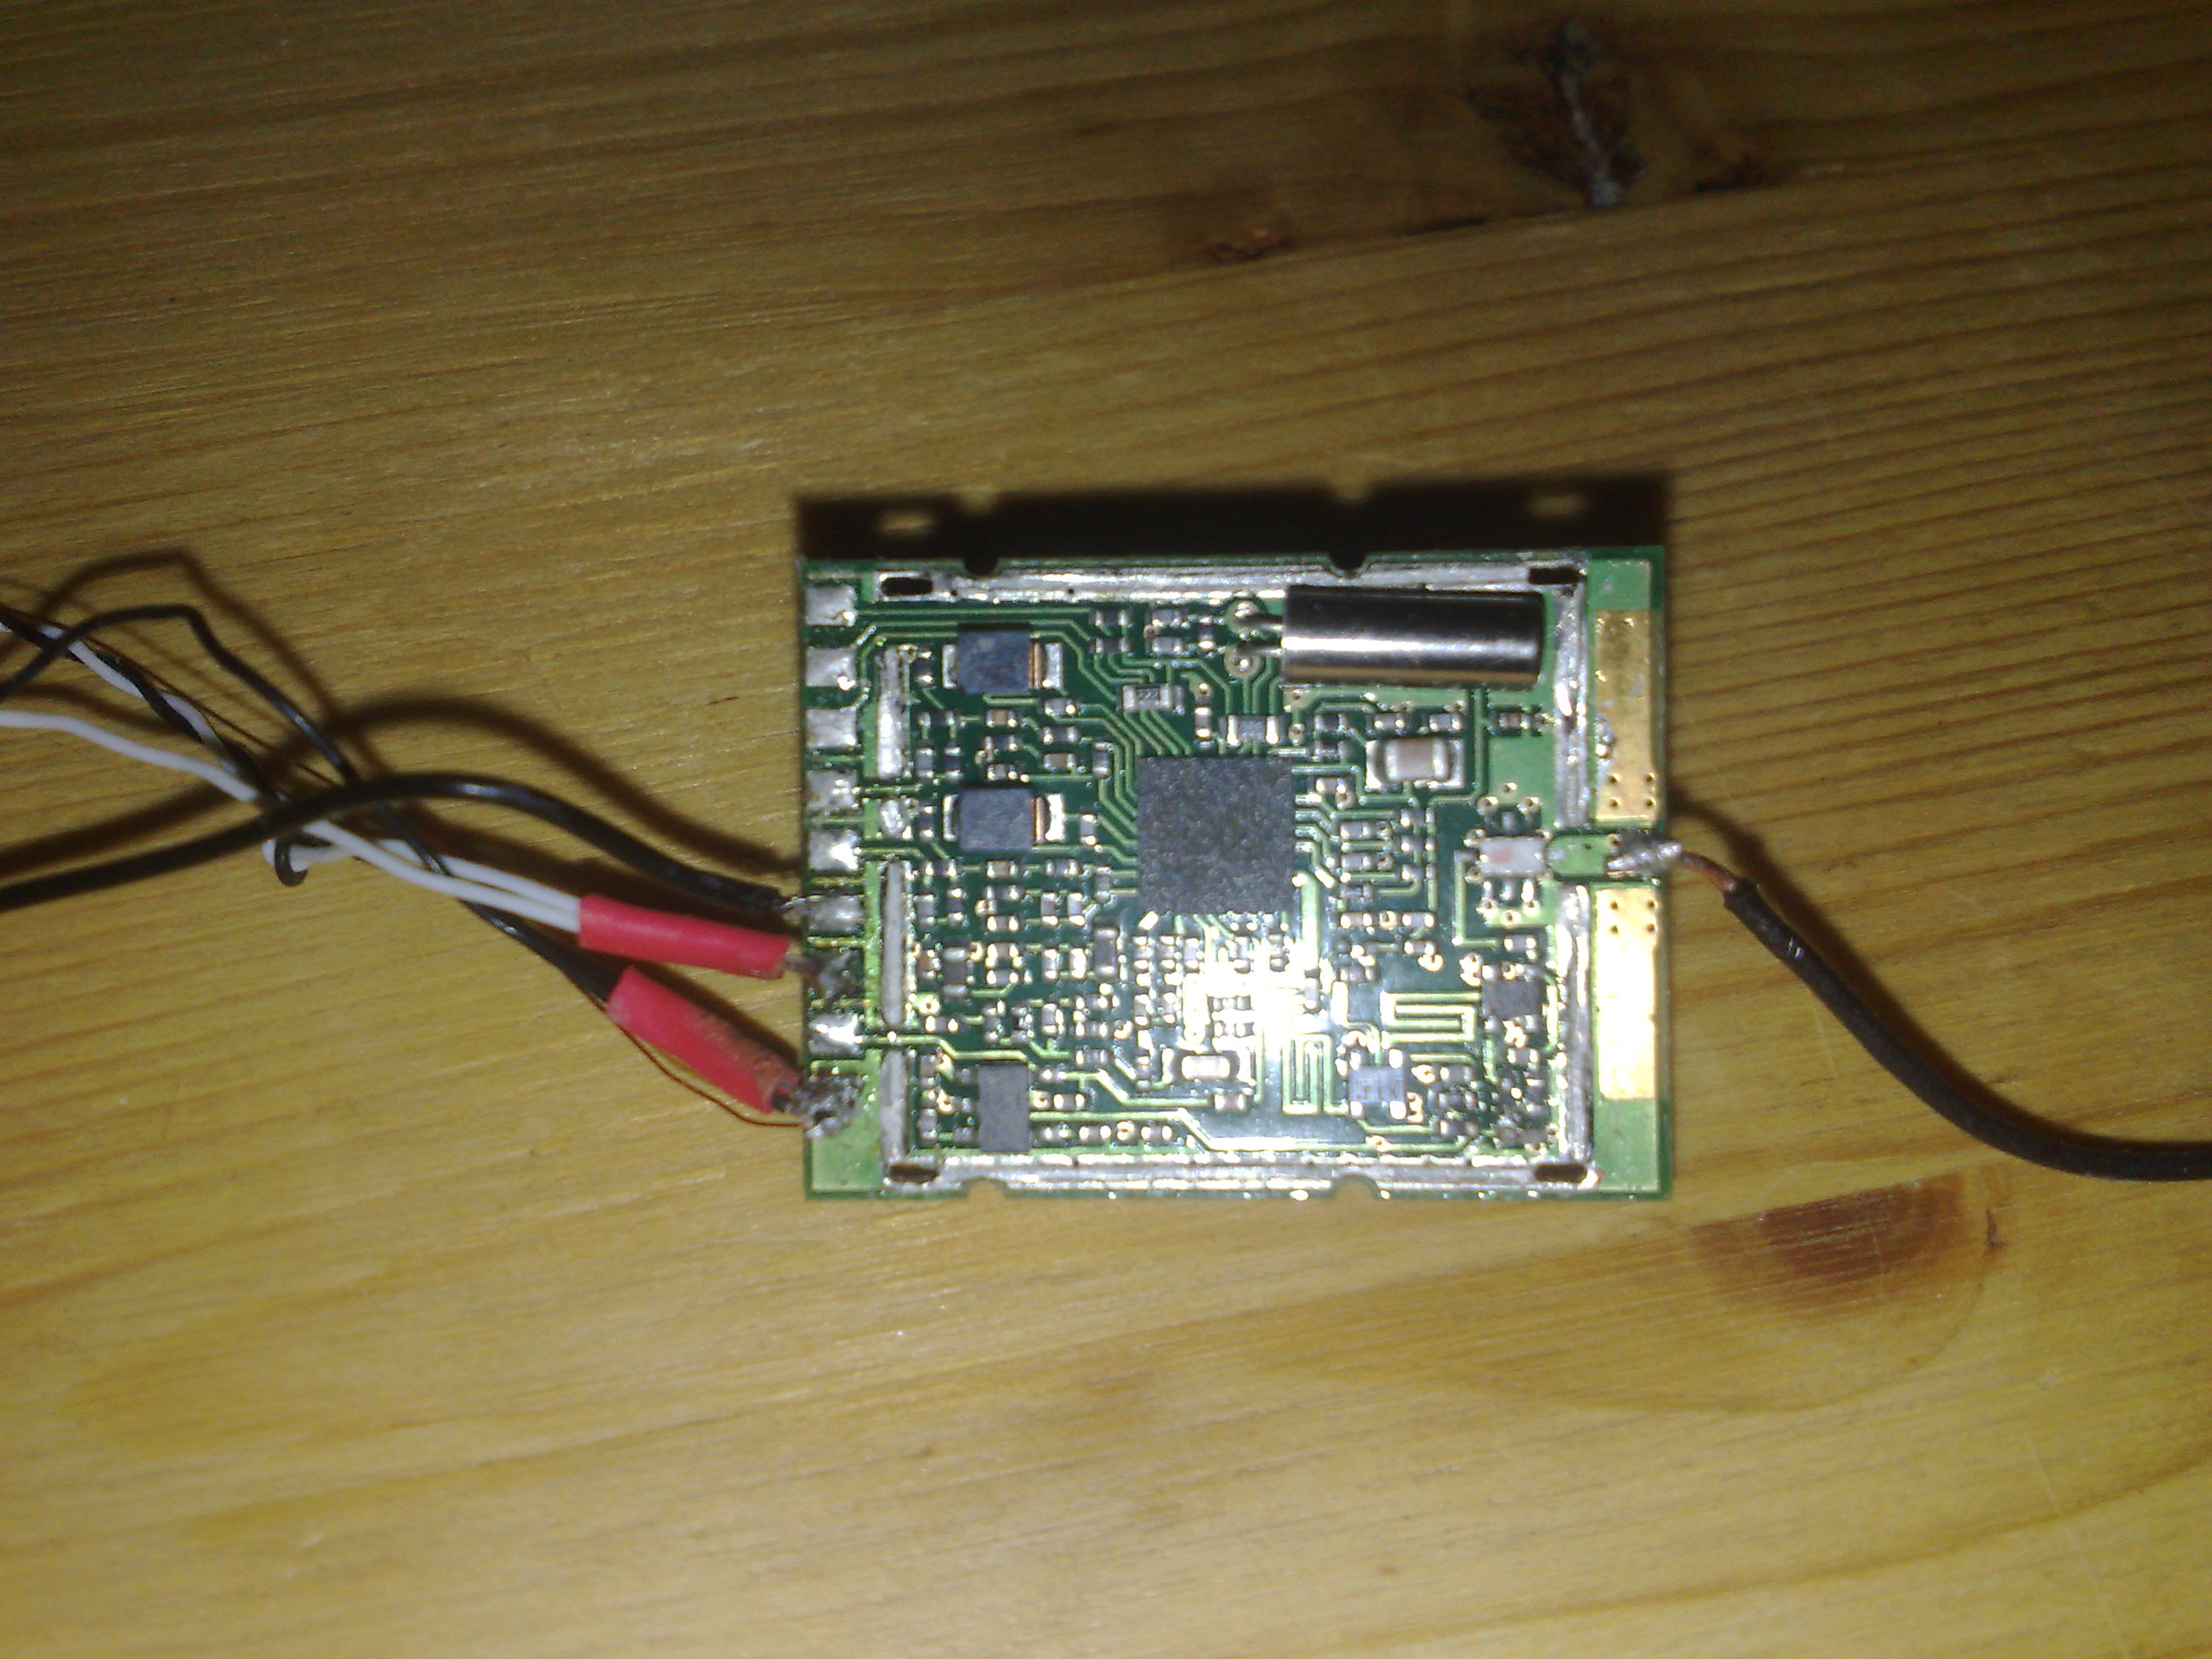
The Airwave transmitter
The transmitter comes with pins and a metal heat-sink. We need to remove that.
Let’s start with the pins
- heat up the bottom of each pin (the tin) while slowly pulling the pin at the other end with a forceps (not fingers, you will burn yourself). It’s a bit tedious, but not very hard. If the black plastic holding the row of pins melts a little, do not worry. You can trash it afterwards. Just do not burn the board.
- check each spot where the pin was is clearly separated from the other spots (tin must not make contact), and that it has minimum tin on it (if you don’t see a hole, but a little square of tin, then that’s good)
Now, move on to the heat-sink
With a screwdriver, pop off the top of the heat-sink. This is quite easy (enlarge the top of the heat-sink a bit with the screwdriver first then it goes off by itself).
There will be 4 metal sides left. Those are a little more delicate. You’ll noticed each corner has a small square metal part. Grab your squeezer/forceps (if possible, not big ones) and grab one of these corners.
Pull slightly but strongly until the square goes in-line with the rest of the metal bar, then gently pull/turn/bend the metal until it gets off the board. The soldering holding the metal bar is minimum and does not require heating to get off. Once the bar is getting away its easy to “peel it off”. repeat with each corner until the heat-sink is gone.
During this process, make sure you do not damage the board!
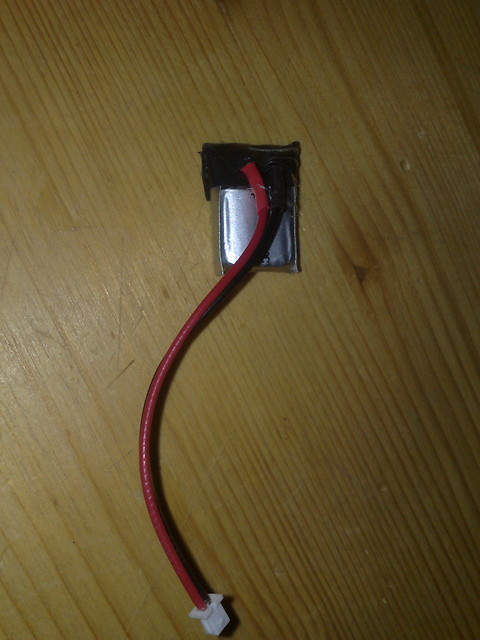
The zippy 50mah batteries
You will need to solder the micro JST HX plugs on the batteries. Cut some micro JST HX wires in half (one per battery) and keep the male plug part of the wire. (keep at least one female side).
Prepare the 2 wires (black and red) for soldering and put your shrink tube onto it if you decide to use it. Super glue the wires to the plug, a small drop should be enough.
This is necessary, because these cheap plugs are going to wear off and break rapidly (they sometimes just break at first use!). They could even damage your battery or heli by shorting it! I had an extensive experience of those plugs and let me repeat again: do the super glue trick, you’ll thanks yourself later.
Secure the battery somewhere (multi-tool, tape, or someone elses hand for example) and make sure you never put the 2 pad (+ and -) into contact or the battery might break/explose/catch fire (really!). Be careful with the solering iron, its easy to short them that way.
Put some tin on each pad, let it heat up long enough for the tin to grip (i usually need at least 20s), else the tin will just fall off.
When ready, put the wires on the pads, solder, let it dry, verify its not going to break (pull gently on the wires, if it breaks, re-solder and make sure the tin grip to the pad).
You can then put the shrink wrap/tubes on top of the solder or just your electric tape, to ensure the battery won’t be shorted.
Repeat for each battery of course.
The Hyperion batteries do not need soldering, at these have standard micro JST HX plugs already.
Making the 5.8Ghz antenna
Take your single core wire and mesure the size corresponding to your frequency. I use 5860mhz, as it does not require any soldering (if you do not know, just use the same frequency as I do).
Here is one calculator to get the antenna length: http://www.csgnetwork.com/antennaevcalc.html
The quarter wave length for this 5860Mhz frequency is therefore 1.2 cm. This is the length we need. Cut approx 1.4 cm, so that 2mm are used for the soldering. The 1.2cm must be the part of the antenna that is clear of the board/solder pad.
Since we use this antenna for a tiny heli and we’re not going to go far, its usually ok to just cut the antenna and use it. However for maximum performance, you might want to cut it a bit longer than required, and test the range, and trim it as necessary until you get the best range.
1/4 wave antenna and micro camera:
Soldering the video transmitter and camera
Cut 3 short wires (if possible one black, one red and one of another color so that you don’t mix up), of approx 3 to 5 cm. Prepare them for soldering.
- Solder the positive (+) of the video transmitter to the camera’s positive (+)
- Solder the video pad of the video transmitter to the camera’s video pad
- Solder the negative/ground (-) of the video transmitter to the camera’s ground.
- You can shrink wrap/tube the camera’s wire, or use electric tape. its so small that I just use electric tape here.
Here are the pins of the camera (notice the long rectangular component for orientation!)

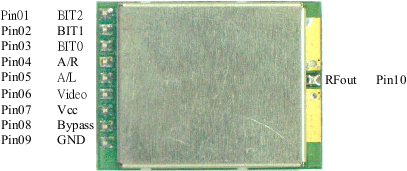
And the pins of the Airwave transmitter (Vcc is +, GND is -, RFOut is the antenna):
Pre-selecting channels
The easiest, lightest way is just to do nothing. This will give you 5860mhz (channel 7).
However, you can solder the “BIT” pins to ground using small wires, if you which to select another frequency.
Use this table for reference (OPEN means no soldering, to GND means link it to the ground (-) ):
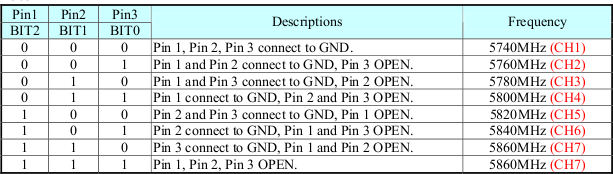
If you change the frequency, don’t forget to cut the proper antenna length (as discussed earlier)
Soldering the Airwave transmitter antenna
Carefully solder the antenna to the RFout pin and verify it’s the length you planned (if required, trim, re-solder, or make a new, longer antenna).
Keep in mind the antenna will be vertical, pointing to the top or bottom.
Soldering the battery wires
Remember the micro JST-HX female plug you’ve kept from soldering batteries? Time to put “her” at good use. Solder the + and - (red is +, black is-) directly on the Airwave transmitter + and -. No voltage conversion is required, even thus the transmitter specs says it accepts a minimum of 4.8V, it actually works at 3.3V (the batteries deliver from 3.3V to 4.2V)
If you did not use shrink tube/wrap, you may also use electric tape once again, around the pins of the airwave, to avoid shortcuts.
You should now have a nice “micro FPV” set, ready to go. Check the connections with your multimeter (verify that there are no shortcuts).
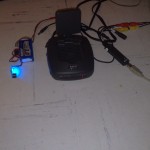
Testing the video transmission
Alright, the first exciting part!
Plug your battery, battery monitor to the Airwave receiver (video the JST/barrel connector), deploy the patch antenna, turn on, and select the channel you planned to use (e.g. channel 7 in my examples).
Plug the audio/video wires (we’re not using audio so it doesn’t matter if you plug them), they’re red/white/yellow from the receiver to your NTSC TV, Goggles, or even computer/laptop if you can (via the EasyCap for example). Again, they must be set to NTSC. (most devices allow PAL and NTSC).
Verify you get a signal (black/white “snow” screen) like this:
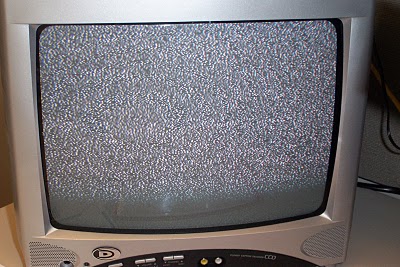
If you do not (black screen e.g.), check your Airwave receiver and connections, or EasyCap configuration. (While we’re at it, once again, if you use EasyCap make sure you set it to NTSC. The camera is available only as NTSC).
Plug one of the zippy 50mah to the micro FPV system you’ve just built, make sure nothing heats up or burn or explodes or kill your cat (else unplug quickly). You should now get an image on the screen. If you do not, check your connections again, if possible with a multimeter. Make sure you damaged nothing. Eventually, ask someone else for assistance.
Once you played a bit with it, check the camera orientation, so that you can differentiate the top of the camera. This will be useful to place it properly (and not reversed..) in the helicopter. Make sure you turn it off by unplugging the battery, as it would drain it up and kill the battery. (you may also turn off the receiver while you are not using it).
Installation on the Blade mSR
Finally you say? :)
You are of course free to install it however you please, but I will detail my own installation as it seems to balance the heli well enough.
One important thing, is to have the video transmitter as far as possible from the RC receiver.. barely possible on and heli like this one however.
Camera
The camera is at the front, slightly facing downwards. I have cut the canopy at the front (you can get a new one for 12-15USD, so that you can exchange them when you don’t want to fly FPV ! they’re easily removable.).
There are 2 small bits of plastic shapes which will make your life hell to place the camera properly. I decide to just cut them out and replace them by clear tape ! however you do it, make sure the camera is well placed, and that the image is going to be correct (power it on to very) and not reversed for example. I used 2 straps of electric tape behind the camera to fix it inside the canopy. It’s flexible and easy to remove. Resists crashes well.
Video Transmitter
I taped it right under the canopy with electric tape. The tape covers the sensible parts of the transmitter as well as holding it onto the canopy. The part of the board with the components is facing to the ground, and will heat up slightly (it wont burn, but make sure you use electric tape so that it doesnt melt the tape..).
The antenna is installed upwards or downwards, just make sure it does not touch the blades or the ground so that it doesnt get damaged. It is important to be vertical.
While you’re at it, verify that your Blade mSR RC receiver antenna is horizontal (it is like that, by default).
This will provide the best signal in both cases.
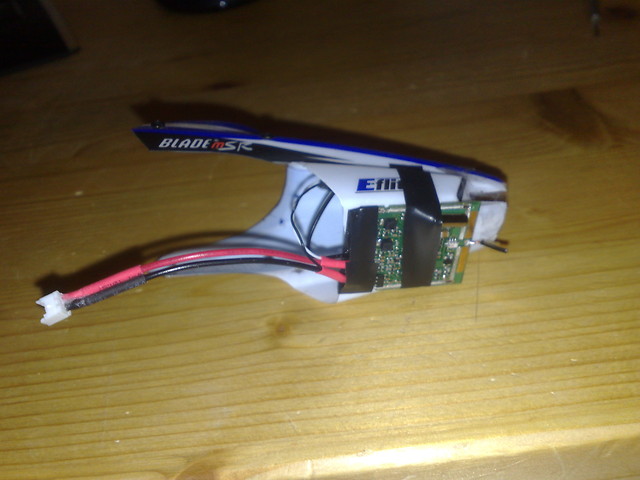
UPDATE
Warning: I have now put the transmitter INSIDE the cockpit, and the antenna goes through the plastic. Cooling and video reception are a little less good, but there’s a good reason for this. See the metal crystal (tube thing)? That’s right. One day, i’ve had a bad landing. Not really a big crash really. It was enough to break the crystal (internally), which effectively kills the video TX :P
Powering up, in the heli
I use a piece of tape to fix the video transmitter battery on the rear skids of the mSR, or sometimes on the tail bom (its not as pretty), to balance the center of gravity (the camera and video transmitter being at the front, they slightly unbalance the heli).
I put the hyperion battery in the regular tray of the Blade mSR, maybe a bit slightly more on the back than usual for the same reason.
When you plug the mSR battery, make sure it is on flat ground. This is because the gyroscope initialize when you plug the battery. If the heli is not on flat ground when it initialize, its going to try to correct wrongly in the air and be unstable/hard to pilot.
Try first to fly it around without looking at the video screen. When you’re comfortable, and the balance of the heli is correct, you can fly with the video. You can even fly only watching the video!
The heli and components are quite strong, so a few crashes usually won’t do no harm, but hey, it’s even better if you don’t crash… :P
When the video goes “snowy” again, land and remove the video (zippy) battery quickly, else you will damage it. In fact, you can just change/recharge it every 10min to make sure this doesn’t happen. It’s charging very quickly due to the small capacity.
Have fun, and if you record some videos of your flights using this setup, be sure to post them here in the comments!
Thanks!
Comments